Friday, August 29, 2008

Revit Tip: More Rotating

More Rotating

I forgot to add a great tip to rotating objects the other day.

If you ever wanted to change your rotation point you can!

When you rotate objects, Revit will take the center point as the reference for rotation.


Well, I want to rotate by a certain point and make one of my walls horizontal. How do I do that?

Simple really, just hove over the arrow and it should change colors.


Now, click and drag it to a new location.


I have successfully changed my pivot point and can rotate with reference to this endpoint.


This works great for rotating all kinds of things from walls, to families, and even will work on an imported CAD file. Wahoo!

Thursday, August 28, 2008

Revit Tip: Rotate and Copy

Rotate and copy

Don’t neglect your Options Bar when running commands!
If you want to copy something and then rotate it in another direction, there is one simple way to do this. You will need to run the rotate command instead of the copy command.


Once you start this command, the Options Bar will appear with some modifiers specific to this action.


We can just hit the check box for Copy. We set our base point and click a second time for the rotation.


This time when we rotate our object Revit will copy it also.


This is a great tool for saving time. You should always check your Options Bar for more ways to expand the basic commands and work more efficiently.


Monday, August 25, 2008

Revit Tip: Door Schedule

Faster door schedule

The standard door schedule that we have been using is very large and full of more of those Yes/No boxes. It needs to be more concise.

Problem

The schedule for hardware is a pain to check, read, and create. There are a million different check boxes that need to be reviewed.


Solution

We have a generic schedule that calls for all this information based on the location or type of door.


This is a simple drafting view that you can copy into your project from another. All you need to do, is make your new door schedule. Just create a new field for the schedule labeled Hardware.


Correlate this field for each door to your generic hardware schedule.


Now you can make sure and include any special conditions in the comments field of the door. This schedule can also be customized for your project, and of course you can always add more hardware types.

Wednesday, August 20, 2008

Revit Tip: Room Tags

Room tags in sections

Tired of having to update your text strings in sections every time something changes? Or maybe you can't quite tell what room that really is cutting through.

Problem

Placing text as a means to tag a room is un-Revit. It also means that you will have to manually update all the text if anything changes. Let's face it, I'm lazy and don't want to do anything twice.


Solution

You can save time and frustration by tagging the room in section. Room tags are set to off in sections by default; Revit will ask you about this the first time.


Then tag your blue boxes in section.


In Revit 9.1, rooms have a height modifier. You can change this so that your rooms are easier to tag and show the actual size of the room.


This also allows you to have, if you wish, rooms that span multiple floors. This could be utilized for stair wells or elevators.

Friday, August 15, 2008

Revit Tip: Workset sharing

Workset sharing problems

Sometimes it can be difficult to work on a project when other users have pieces checked out.

Problem

If you are working in a project that has worksets enabled, users will checkout sections of the model while they are working on it.


When you need to edit the same object, Revit will not allow it until the other user relinquishes control.


Solution

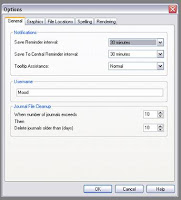
First, if both of you are working you will need to Save to Central. If the other user is not working on the file, but has parts checked out, then you can handle the issue yourself. Open another Revit session. Close the bank drawing the opens at startup. Select the Settings menu and click Options.


Here you will see the username that you are using to work on projects. Change this to the missing user and hit ok.


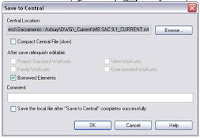
Now open the project and remove the user from worksets. Save to Central and make sure to relinquish control of Borrowed Elements. This should purge the user from the file so that you can work without problems.


Don't forget to change your username back before closing the second version of Revit.

Sunday, August 10, 2008

Revit Tip: Door Schedules

Faster and cleaner door schedules

Create a door schedule and modify all sheets at once.

Problem

A Yes/No type schedule means that you need to check each sheet. This type has three settings, on, off, or blank. Once you check away from blank you are only left with on or off.


This can create a confusing schedule to read.


Solution

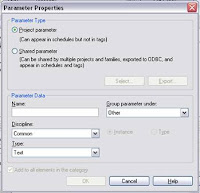
Create a schedule that uses text fields instead of Yes/No. When you edit the Drawing List schedule, make sure the parameter that you add is text.


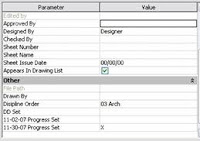
Then, once the field is created, you can use an "X", "O", or any other letter to delineate which sheets have been modified for your revision.


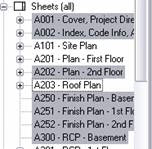
This is a bit more legible on your sheet, and you can modify multiple sheets at once. From the Project Browser, select the sheet you need to modify using shift or control.


Right click and select properties. Scroll to the new revision or release date you created and enter the text string of your choosing.


Tuesday, August 5, 2008

Revit Tip: More Frame Elevations

More on Frame Elevations

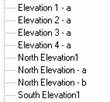
Create a new tag to separate your frame elevations from typical elevations in your project browser.


Problem

Your project browser can become very full with all the views and elevations.


Solution


To help organize the elevations into categories you can create a new tag for specific types. Start from the Settings menu and click on the View Tags slide out. Choose Elevation Tags…


Now, the only thing you have to do is duplicate the existing tag.


Whatever name you choose for the tag is the heading you will find in the Project browser. Once, your tag is created just make sure to use this tag when creating a new elevation or converting existing tags to the new category.


And if you didn't guess by now, this method is how you can edit the look of your tags.

Friday, August 1, 2008

Revit Tip: Sheet Edit

Edit multiple sheets

Ever printed an entire set only to find that some sheets have the title block information incorrect?


Problem

You have 60 sheets in your drawing set and all of them need to have the same information changed.


Solution

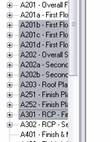
You can change any of the shared parameters on your sheets all at once. Simply select all the sheets from the project browser window on the left of the window. You can use shift and control to select multiple sheets.


Right click on any of the selected sheets and select properties.


Modify the settings as needed for all the sheets.