Thursday, September 25, 2008

Revit Tip: Center objects

Center objects in a space

Manage objects and that dreaded EQ symbol easily.

Problem

I want to center an object or element in a space. I also want the dimensions on either side of the element to read EQ, but Revit doesn't allow me to change the text of any dimension strings.


Solution

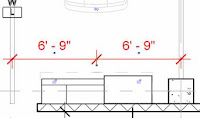
Set your dimension string to the center of your object, and make sure the EQ is not crossed out.


Now, with the dimension string active, hit the Edit Witness Lines button from the menu.


Now you can move the witness line from the center of the object to the edge.


Then add another witness line at the other side of your object.


Click away from your dimension line and your new string is set.


Have fun with this. I am sure the possibilities are endless.

Saturday, September 20, 2008

Revit Tip: Shortcuts

Shortcut keys

Work faster with shortcut keys!

Problem

Most of us have come from the days of AutoCAD, where working faster meant knowing every one of the 500 shortcut command keys. Now we are forced to work with Revit and its' point and click interface.


Solution

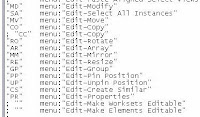
Know your shortcut keys! There is a whole text file that lists every one of the 499 commands that Revit has.

C:\Program Files\Autodesk Revit Building 9.1\Program\KeyboardShortcuts.txt


You can even edit this file (administrator rights required) to suit your needs. Just find the command you use most and insert between quotes a two letter shortcut. Just make sure it's not already in use. Remove the semicolon before the command and save this file. You will have to restart Revit in order for the change to take affect.

A quick example:
Let's say I want to change the New Sheet command. By default it reads below.

; "" menu:"View-New-Sheet"

I want to make the command NS, so it should read below in order to work.

"NS" menu:"View-New-Sheet"

Enjoy, and we expect everyone to work at least 15% more efficient now.

Monday, September 15, 2008

Revit Tip: Tag defaults

Tag defaults

Tag stuff once and don't have to change it later.

Problem

Somehow, unbeknownst to you, the default tag has been set to some random format. You can't change the tag type as you are tagging items. Only a few properties can be changed as you go.


Solution

You want that tag to show up right the first time you create it, so if it's wrong - fix it. You can change the default tags in two ways. The first is right before you tag your item. Start by checking Tag from the project browser, or use the TG shortcut.


Now, before selecting your item hit the Tags… button.


This will bring up the default tag menu.


Now you can change the default for any of your items, or load in a different tag for one of them.

The other way to get to this menu is through the Settings menu at the top of the window. Scroll down to Annotations and select Loaded Tags.

Wednesday, September 10, 2008

Revit Tip: Purging Elements

Remove unused components from your file

With as large as some of these buildings get, it is always good to reduce the amount of information in your Revit file, especially when you don't need it.

Problem

Using old files to start a new project creates a lot of unnecessary components and information that you may not need.


Solution

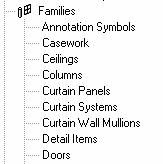
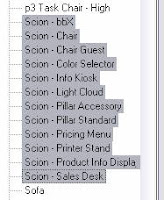
Remove the offending information with your project browser. Simply scroll from sheets all the way down to the bottom of the list. You should see a heading labeled Families.


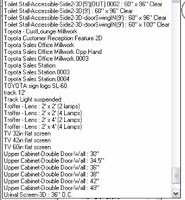
If you expand this out you can see the individual elements that make up the components of your project.


I have highlighted the Toyota elements, and since this isn't a Toyota dealership, I am going to remove them. Right click on the highlighted elements and select Delete.


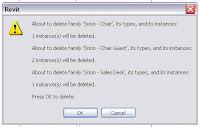
Oh no! I got the following error. This means that someone has used these pieces in the model. I can choose to remove them without regard, or find them and replace them with the appropriate piece.


Careful though, Revit might not do this with all elements of the model. So far, I have seen that it does warn me when I try to remove something that exists in the project. Also, remember that some elements are harder to add to a model than others. Walls, for example, need to be created in the model or transferred from another project.

Saturday, September 6, 2008

Revit Tip: Exporting

Export to AutoCAD

Let’s say that I need to update my consultants with plans. How do I do that when we use Revit and they use some arcane format called AutoCAD?

Simple, we are just going to export our highly detailed 3d model to a 2d line drawing for them to use.

Just choose File and move to Export. On the flyaway, select CAD Formats.


This will bring up the export window.


Before we click Save, we should set some of the settings first.

If you are going to be sending multiple files, then the first step I take is to choose which ones. You do this by changing the selection in the Export range box. Current view will only export the sheet you are on now, but if you choose Selected views/sheets, then you have options the same as when printing.


Check you sheets and return to the Export window when you are done.

The second thing I do when sending files is to change the naming convention to Short. Then I check to make sure the output format is one that the consultant has, for instance, AutoCAD 2004 DWG file type.


The last step is to make sure you know where the files are going on our server, which you can specify in the uppermost portion of the Export window. Click Save and Revit will go to town. This takes awhile when you do multiple sheets, so maybe you should go out as well.

Remember, the consultants XREF these files into there AutoCAD drawings for reference, so it behooves you to replicate this process the exact same every time. It will make their life easier, which in turn, will make your life easier. It is also fairly simple process, so make sure to update your people every chance you get. You wouldn’t want them drawing off the wrong base plan.

Friday, September 5, 2008

Revit Tip: Cameras

Quickly rotate a camera view

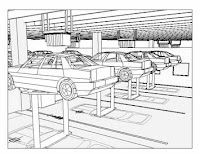
You can rotate your view while in a 3d camera view to tweak what you are looking at.

Problem

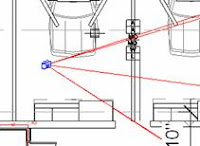
Usually, you need to change the view depth and angle of view from the plan for a camera view.


This can be difficult, especially since the camera can disappear once you have unselected it.

Solution

Change and rotate from within your camera view. Simply hold down shift as you click your scroll wheel or right mouse button (depending on your mouse settings).


You can do even more, by clicking on an object in the view. This will allow you to rotate around this object instead.


Have fun looking at your project from many different views!

Thursday, September 4, 2008

Revit Tip: Printing

Printing

When printing multiple sheets in Revit there are several things to remember. Don’t forget them either.

  1. Use Revit PDF Writer 4.2 for most all of your PDF output.


  1. Remember to name your files appropriately. See the naming convention format that your office u. We don’t like bad names. Also, make sure to save your files to the server every time you need to keep a record. Storing files locally is a bad idea, especially if others will need access to them in the future.


  1. If you are printing multiple sheets, uncheck views and make sure to hit Check None before making your selections. You only want to print sheets, not views, and just because you uncheck views it doesn’t mean that one of them isn’t still checked. Revit can be sneaky like that.


  1. Check the Setup for your sheet view and paper sizes.


  1. Make sure your Zoom is set to 100%. Fit to page is bad for scaling.


  1. Remember you can save your page settings for quick access in the future. The key point being quick, i.e. saves time, more efficient, less likely to screw it up.


  1. Hit OK and run your print job.

If you have problems with text being misaligned in your final PDF, for instance in your schedules and charts, then use the Adobe PDF print driver.

Tuesday, September 2, 2008

Revit Tip: Dimensioning Frames

Dimensioning frame elevations

When it comes time to dimension a frame elevation Revit can give you a lot of trouble displaying the desired dimension string.

Problem

Revit sometimes will not display a dimension string you just completed.


Solution

Instead of displaying some dimensions in a frame elevation, Revit will often hide portions of a string from view. Sometimes the solution is simply making the viewport bigger to accommodate the end line of the dimension string.


Other times it can be near impossible to get any of the dimension strings to show up. This is particularly tricky when we are elevating our curved service drive. One tip to make sure that you don't get any trouble is in relation to the elevation creation. Make absolute certain that the elevation you create is parallel to the frame you want to dimension.

Bad:


Good:


Otherwise, any dimension you create will cause lots of problems.